VR Panoramas > Stitching Techniques
Stitching with Panorama Factory
Panorama Factory is a very easy program to start using. By default when you start it, a "new project" wizard pops up to guide you through the stitching process. It automates many of the tasks together and presents you with a single step by step friendly guide. If you know what you want, you can quit out of it at any stage and use the underlying "classic" interface.
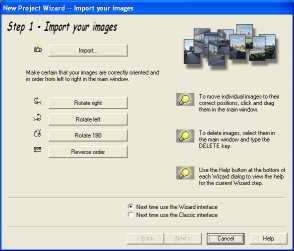
Step 1: The first step provided by the wizard, is to load in the set of images you will be stitching, and to rotate them to be the right way up, if necessary:
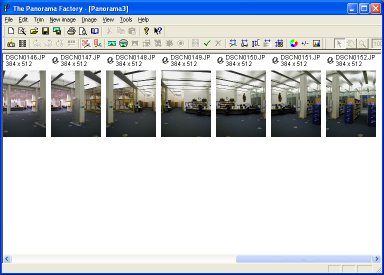
In the background window, you will see the application load your source images into the main window:
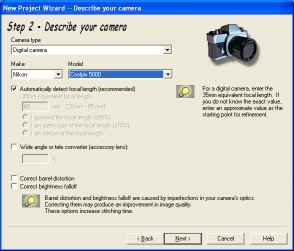
Step 2: You are asked to tell Panorama Factory what camera/lens you are using (in my case the Nikon CoolPix 5000). You can also tell it the focal length (this defaults to 35mm).
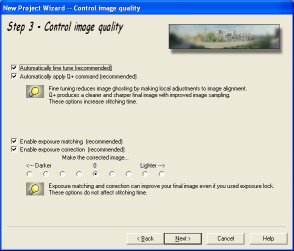
Step 3: A nice touch here is colour/exposure correction: you can say what you want to do with the final picture. There's not much to say about this really - you'll have to use your own judgment on the pictures you have.
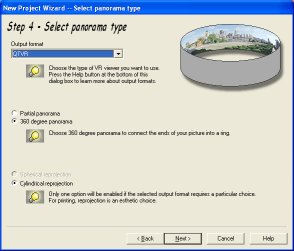
Step 4: Here you decide whether to use cylindrical or spherical re-projection. There'a an illustration of the effect this will have on a panorama in the corner. After the Wizard has completed you can quit the Wizard and then from the file menu you can save the image or an IVR/QTVR. Note that QuickTime does not support spherical projection.
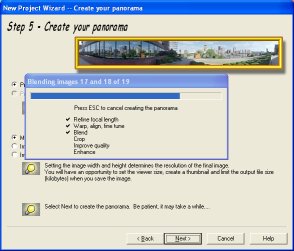
Step 5: Next you can limit the size of the generated image and create a thumbnail (if you are outputing to IVR or QTVR). A very nice touch here is being able to limit one or both dimensions using pixels, centimetres or inches...
Click next to start the stitching process. The progress indicator is extremely good at showing you what it is doing and how far it has got, which is a good thing as this application takes its time to do things properly!
Step 6: Now save the final panorama and/or print it. You can also move the wizard window out of the way to take a good look at the panorama in the main window behind first.
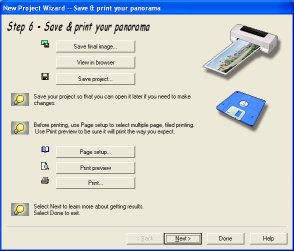
After that, some frequently asked questions are presented to help you resolve possible problems.
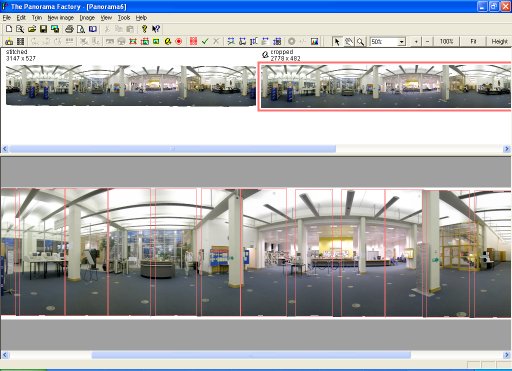
Click done to return to the "classic" interface. You can see the stitched image is shown:
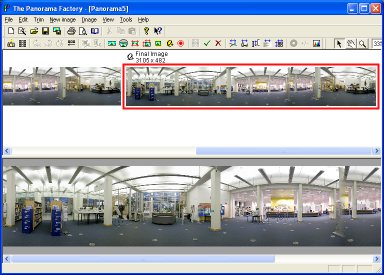
Red rectangles appear on the picture to show the areas of overlap. You can then adjust the position of the images.
You can now fine tune the panorama. The fine tune button will prompt Panorama Factory to fine tune all the pictures, but you can also manually fine tune, or adjust the fine tuning that Panorama Factory has applied. Simply click on the top of a red overlap rectangle to reveal the fine tuning tiles.
And that's it. It's a very comprehensive program. Another nice feature is the print feature - it lines up each print with an "x" to mark where the join is! Now that's attention to detail...
Finally, I should note that at the time of writing a new version of Panorama Factory is available offering the ability to create hotspots - this makes it a truly excellent package.